Now that you have submitted some jobs, you will want to monitor them in the Qube! UI.
If you have been working through the Qube 101 documentation in order, you will probably be running the Wrangler View, which has a white background. In this section we are going to skim across the surface of the Qube! UI. Visit the Qube! UI User's Guide for more information.
Launch the Qube! UI
To launch the Qube! UI, do this:
- Windows: Click on the PipelineFX->Qube! UI start menu item, or double click it at Program Files\pfx\QubeUI\QubeUI.bat.
- OS X: Run /Applications/pfx/qube/QubeUI.app
- Linux: Run /usr/local/pfx/qube/qubeui/qubeui.
You should see this:
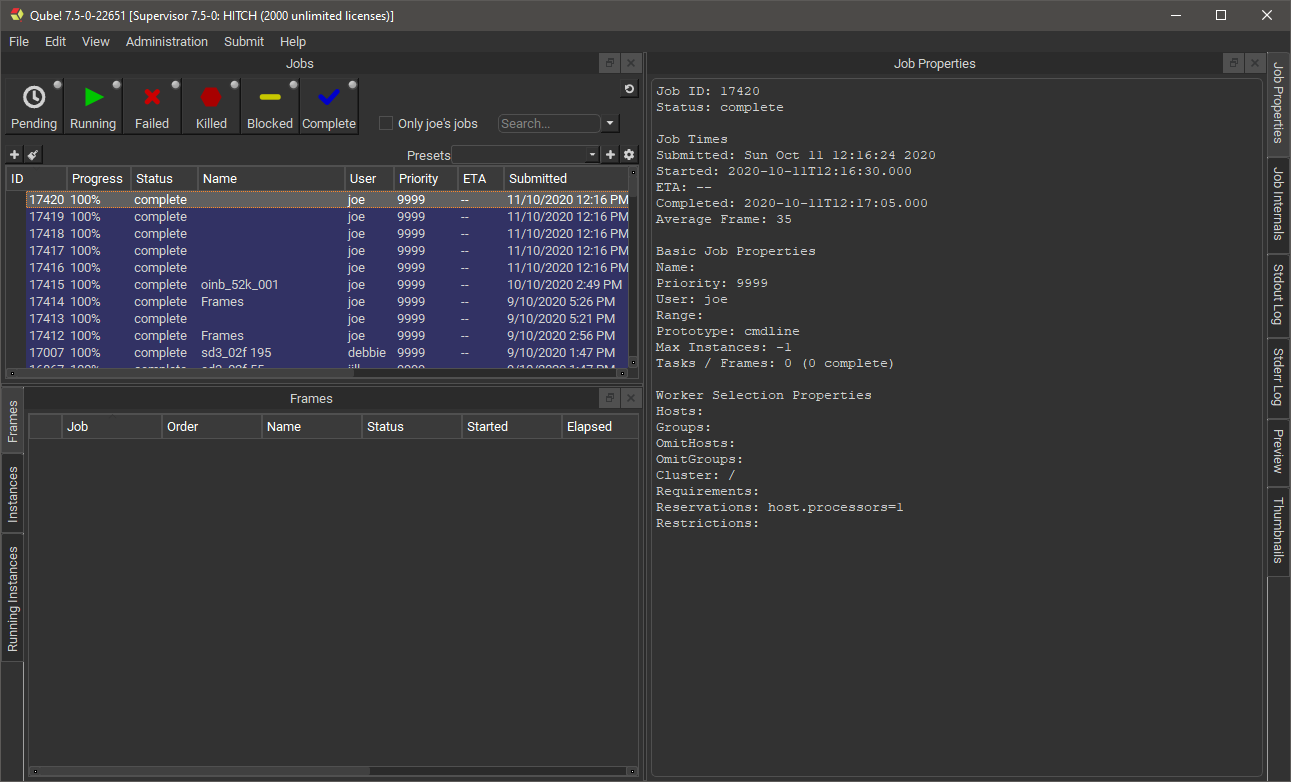
You should see the test jobs or other jobs that you have submitted. Notice that they are color coded - if you are lucky, they will all be blue, which is the color of a successfully completed job. Jobs which failed are colored red. The jobs also have a status, such as "complete", "failed" or "running." Running jobs are shown in green. There are other colors for other statuses, which you will become familiar with as you submit and monitor jobs.
Overview
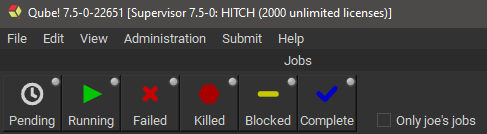
The row of buttons just under the Jobs tab is a set of filters which will show or hide jobs in the Jobs Panel. An important one to know about is the User Filter - when set, you will only see your own jobs. When unset, you will see all jobs. Click and unclick this button to see the difference.
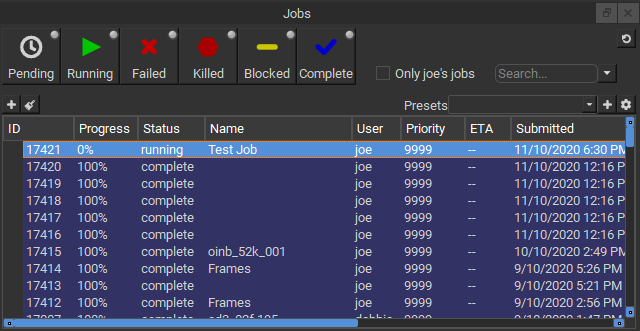
Let's have a look at some simple tasks you can do from this UI. The Jobs pane shows your job(s). By default, they are sorted by Jobid, but you can sort them by any other column by clicking on the column header. For example, you can sort them by Name by clicking on the "Name" label at the top of that column. Clicking once sorts them in ascending order, clicking again sorts them in the other direction. Now, click on one of your test jobs in the Jobs pane.
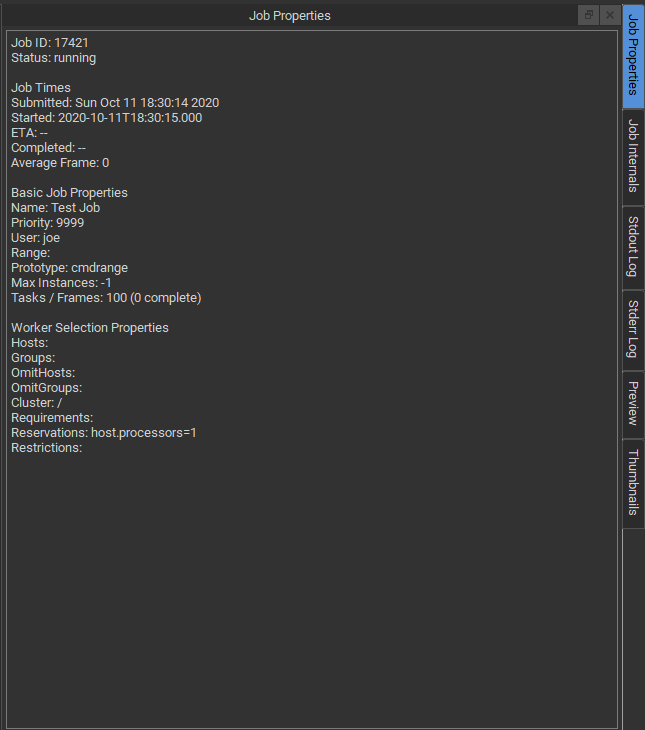
Notice that in the Job Properties panel, you can look at the Job Properties on one tab, and the Also output in the Stdout Log and StderrLog panels.
Interact with a Job
Right-clicking on a job (or a frame, worker, or instance, for that matter), will bring up a context menu:
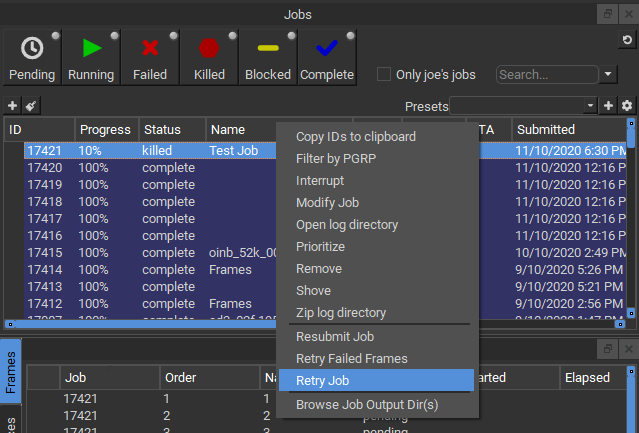
The contents of that menu depend on the entity you clicked. For example, jobs will have a different list of menu items than will frames or workers. The menu items are dictated by plugins which can be created or modified. A more detailed description of the creation or modification of plugins can be found in Adding Custom Plugins.
As of version 7.5-0, the list of available actions are as follows:
- Job
- Copy IDs to clipboard: Place the job ids of the selected jobs in your copy/paste clipboard.
- Filter by PGRP: Display only jobs that belong to the selected job's PGRP.
- Interrupt: Stop the job immediately, and sets the status back to pending. This is typically used when a high priority job is starved for resources - manually interrupting a lower priority job will free up those resources to allow the high priority job to start. The lower priority job to start up again as soon as workers become available.
- Modify Job: Change modifiable job properties.
- Open log directory: Open the directory containing the job logs for this job. This is only relevant if you're on the worker running the job or supervisor.
- Prioritize: Change the priority of the selected job.
- Remove: Stops the job immediately (if running), and permanently removes the job from the qube database. This cannot be undone.
- Shove: Force the supervisor to reevaluate this job for dispatch. This is a good way to start a job that is stuck in the "pending" state, even though all of its requirements can be met.
- Create a zip file of the log directory: Zip the log directory and open the containing folder.
- Block (Finish Current): Stops this job after the currently rendering frame(s) complete. The job will remain in a "blocked" state until it is manually unblocked.
- Block (Purge): Stops this job immediately, but sets the job state to "blocked". The job will not run again until it is manually unblocked.
- Unblock: Remove the "blocked" state from the job. All frames that have not completed will go back to a "pending" state. Those that have completed or failed will remain completed or failed.
- Kill Job: Stops this job immediately and sets the state to "killed". A job that is killed cannot be continued - it can only be retried, resubmitted, or removed.
- Preempt Job: Preempt the selected job.
- Resubmit Job: Submit a new job with the selected job's parameters. A submission dialog is opened so you can modify the job before submission.
- Retry Failed Frames: Re-render all frames marked as failed
- Retry Job: Start this job over, using the same job id. All frames will be re-rendered, regardless of whether or not they had previously completed.
- Browse Job Output Dir(s): Open a file browser for each output dir in this job.
- Worker
- Ban host: Ban the selected worker on the supervisor.
- Partially Lock: Lock a specific number of slots on the selected worker.
- Ping: Ping the selected workers and retrieve basic information about them.
- Reboot host: Reboot the selected workers.
- Shut down host: Shut the selected workers down.
- Lock Host (Finish Current): Same as above, but the currently rendering frames are allowed to finish.
- Lock Host (Purge): Stop all jobs running on this worker immediately, then leave the worker in a "locked" state which will prevent it from accepting any more work until it is manually unlocked.
- Unlock Host: Remove a worker lock.
- Remove: Remove the selected workers from the Qube! farm.
- Frame
- Select worker: Display the Workers Panel and select the worker than rendered this Frame.
- Complete: Change the state of this frame to "complete," even if it has not yet run.
- Retry: Re-render the selected frame(s)
- Block: Set the frame's state to "blocked". This will prevent the frame from being rendering until it (or the job) is manually unblocked.
- Unblock: Remove the block from the frame, setting it back to a pending state.
- Kill: Stop this from immediately and set the state to "killed".
- Instance
- Select worker: Display the Workers Panel and select the worker than ran this instance.
- Block: Stop this instance from processing work and set its state to "blocked". This instance will not process any more work until it is manually unblocked or the job is retried.
- Unblock: Remove a block from an instance.
- Complete: Mark this instance as complete.
- Interrupt: Stop this instance from processing any more work, but set its state back to "pending". As with a job's "interrupt" this is typically done to manually free up resources that could be used by higher priority jobs.
- Migrate: Stop this instance and set its state back to "pending". Default supervisor settings dictate that the next time this instance starts, it will start on a different machine.
- Retry: Restart this instance, regardless of its current state.
Watching Progress
Once a job is running, if it takes more than a few seconds (and most do) then you will want to keep an eye on progress. The UI will display changes to Jobs and Workers in real-time but frames and instances are only loaded when a job is selected. To update the frame and instance lists double click on the job. You can force an update by simply clicking on the job. Due to network interruption it is possible for some jobs to become out of sync, if you suspect this has happened click the sync button shown in 1 below.
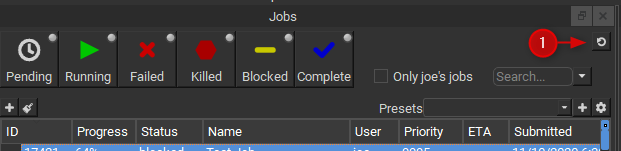
Use the sync button sparingly as it can place undue load on the supervisor on large farms.
Looking at Job Properties/Internals and Output
The Job Properties Panel lists basic attributes of the job. The Job Internals Panel shows more in-depth information such as the job package, callbacks in use and the job history.
The output and error of the job's rendering process can be viewed in the Stdout Log and Stderr Log Panels. You can review the image output in the Thumbnails Panel and Preview Panels. Check the User's Guide for the Qube! UI for more information on how to use these panels.
Submitting New Jobs
The Qube! UI can be used to submit jobs to Qube! through the Submit menu item at the top. However, in most cases you will be setting Qube up to allow submission directly from your application, such as Maya or 3dsMax. Submitting directly from applications was covered in the previous section. However, you can still use the UI to submit test jobs, to make sure that things are still working as expected, and to submit jobs for applications where you haven't installed the inApp interface.