-

-

- Created by Unknown User (joshua), last modified by John Burk on Feb 01, 2017
Step by step instructions for submitting Houdini jobs with Qube!
Install the Houdini submission UI:
Run WranglerView and go to the Install App UI menu item (File -> Install App UI) as shown.
Choose "Install Houdini (loadOnce) App UI..."
This requires that Python be installed on any Worker that runs a Houdini job. If Python is not installed, please see Installing Python.

Once installed you should be able to Assign a Qube_submitRop to your output

This will present a pre filled submission UI. Ensure sections marked in red have the correct details.
Useful Settings
IconWhile not strictly required, the following settings are useful for getting a better result. You will need to turn on "Expert Mode" (check box at the bottom of the submission UI) in order to get access to them.
- Make sure that the Nuke version and the OS are set correctly for the Worker(s) that will execute the job.
- Optimize the use of cores. Set the "Slots = Threads" checkbox and then set the "Specific Thread Count" to a value like 8 (assuming you have 8 cores). (If you have Designer licenses, only set the thread count. Do not check "Slots = Threads")
- By default, Qube! will not retry failed frames. So set the "Retry frame/instance" value to 3 or 5, to get 3 or 5 retries before it gives up. Related to that, the default wait between retries is zero seconds, which is typically not useful. Set the "Retry Work Delay" to a value like 5 or 10 to allow machines time to recover from temporary problems such as network errors.
- Because the path to the Nuke executable is part of the submission parameters, it is not possible to mix OSs with Nuke jobs - that is, although you can submit from, say, Windows to OS X, you cannot submit to both Windows and OS X at the same time.
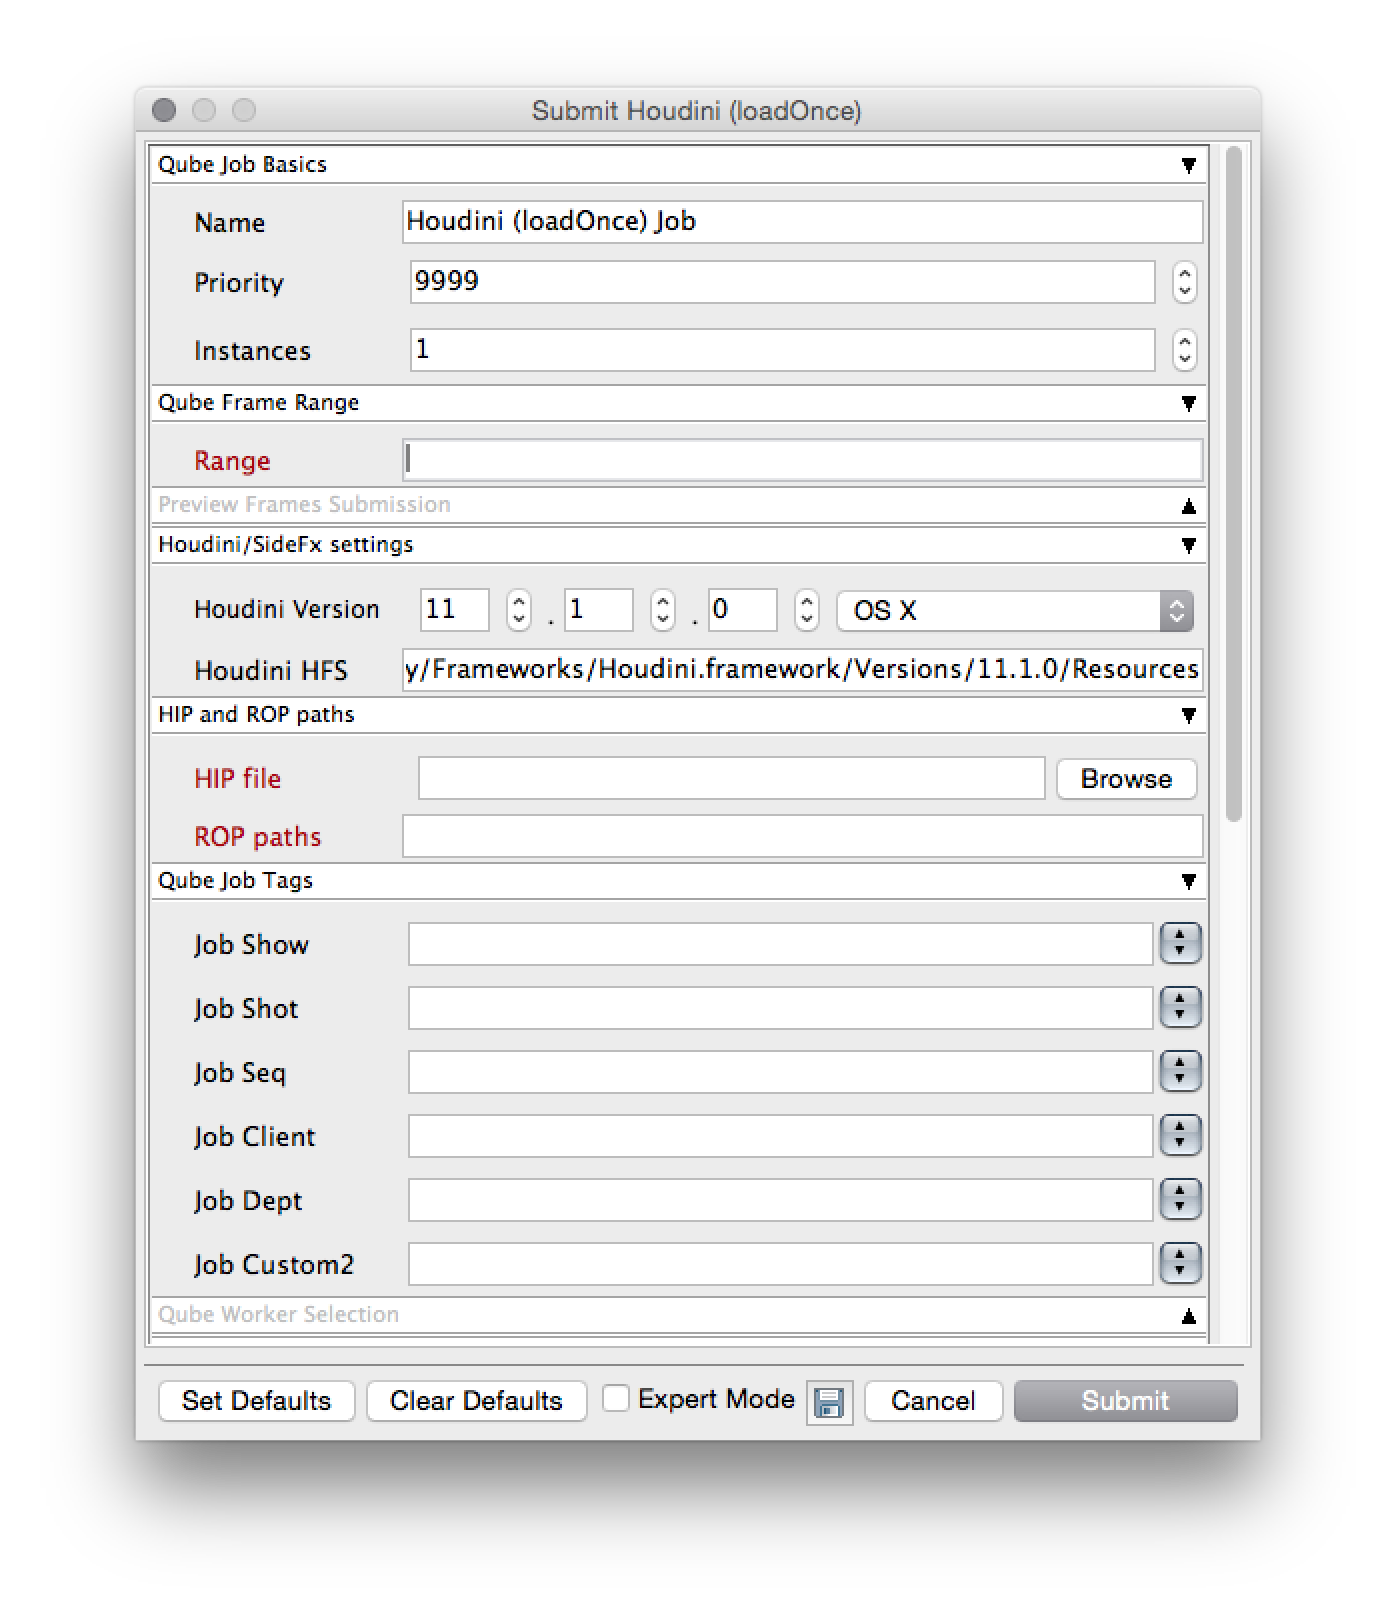
Click "Submit"
For further details on the submission UI see below.

Job Submission Details
Not all sections need to be filled in in order to render only the fields marked in red are required

Name
This is the name of the job of the job so it can be easily identified in the Qube! UI.
Priority
Every job in Qube is assigned a numeric priority. Priority 1 is higher than priority 100. This is similar to 1st place, 2nd place, 3rd place, etc. The default priority assigned to a job is 9999.
Instances
This is the number of copies of the application that will run at the same time across the network. The combination of "Instances=1" and "Max Instances=-1" means that this job will take as much of the farm as it can, and all jobs will share evenly across the farm.
Examples:
On a 12 slot(core) machine running Maya if you set
"Instances" to 4
"Reservations" to "host.processors=3"
Qube! will open 4 sessions of Maya on the Worker(s) simultaneously, which may consume all slots/cores on a given Worker.
if you set
"Instances" to 1
"Reservations" to "host.processors=1+"
Qube will open 1 session of Maya on a Worker, consuming all slots/cores ("host.processors=1+" is used for all slots/cores).
Max Instances
If resources are available, Qube! will spawn more than 'Instances' copies of the application, but no more than 'Max Instances'. The default of -1 means there is no maximum. If this is set to 0, then it won't spawn more than 'Instances' copies.
More on Instances & Reservations & SmartShare Studio Defaults

Range
Frame range for the job (e.g 1-100, or 1-100x3, or 1,3,7,10). Most jobs require a frame range to execute on the Workers. You can set this range in a few different ways :
- "1-100" will just render the range between 1 and 100
- "1-100x3" will render every 3rd frame in the range 1 to 100; 1, 4, 7, ..., 94, 97, 100
- "1,3,7,10" will only render the selected frames 1,3,7,10
rangeOrdering
Order to render the items. (Ascending=1,2,3,4,5...,Descending=10,9,8...,Binary=first,middle,last...) You can set the order in which your frames are rendered. The drop down options are:
- "Ascending" - this will render the frames counting upwards from your start frame
- "Decending" - this will render the frames counting backwards from your end frame
- "Binary" - This will render the first, last, and middle frames of the range, then the middle frame of the first half and the middle frame of the second half, and so on. This is useful for sampling the frames in the sequence to make sure it is rendering correctly.

Use Preview Frames
Enabling preview frames will create 2 jobs:
- A primary dependent job with a higher priority that will render the selected frames first
- A secondary job with lower priority that will render the remaining frames. This will return the selected frames faster so that you can check the accuracy of your renders.
Frame Numbers
Choose the frames that you wish to render first. If left blank the default is to render the first frame, the last frame and the middle frame in that order. You can select specific frames by adding comma separated frame numbers e.g 1,2,10,15,75, or a range with, e.g., 1-100x5 (1 to 100, every 5th frame)
Preview Priority
Choose the priority for the preview job. This can be set by the site admin.
Preview Subjobs
Choose the number of instances / subjobs for the preview frames. By default, this is equal to the number of preview frames - that is, it will try to do all the preview frames at the same time.
Note that when you submit a job with preview frames enabled, it will actually submit 2 jobs—one with the preview frames list at a higher priority, and another with the rest of the agenda, at the normal priority (as specified in the job's Priority field). You will get, consequently, 2 job IDs for the submission.
Houdini Specific Parameters

Houdini Version
Select the version and platform of Houdini on the workers.
Houdini HFS
Enter the Houdini HFS directory.
Hip File
Enter or browse to the Houdini .hip file. This is required for submission
ROP Paths
Comma separated ROP eg: /out/mantra

Qube Job Tags
New in Qube 6.5
Note: The Job Tags section of the submission UI will not be visible unless they are turned on in the Preferences in the Wrangler View UI. Job Tags are explained in detail on the Job Tags page.
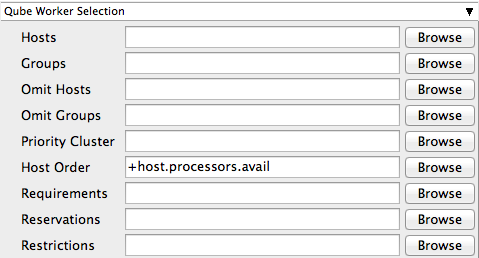
Hosts
Explicit list of Worker hostnames that will be allowed to run the job (comma-separated).
Groups
Explicit list of Worker groups that will be allowed to run the job (comma-separated). Groups identify machines through some attribute they have, eg, a GPU, an amount of memory, a license to run a particular application, etc. Jobs cannot migrate from one group to another. See worker_groups.
Omit Hosts
Explicit list of Worker hostnames that are not allowed run the job (comma-separated).
Omit Groups
Explicit list of Worker groups that are not allowed to run the job (comma-separated).
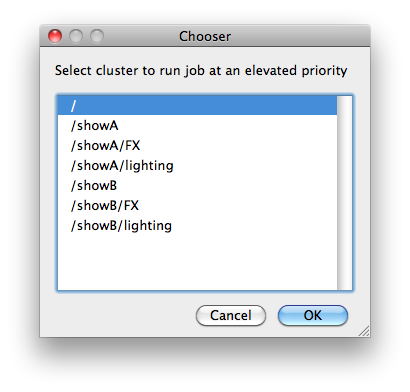
Priority Cluster
Clusters are non-overlapping sets of machines. Your job will run at the given priority in the given cluster. If that cluster is full, the job can run in a different cluster, but at lower priority. Clustering
 |
|---|
Example:
|
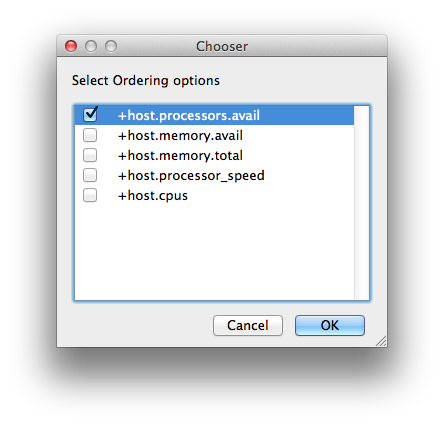
Host Order
Order to select Workers for running the job (comma-separated) [+ means ascending, - means descending].
 |
|---|
Host Order is a way of telling the job how to select/order workers
|
Requirements
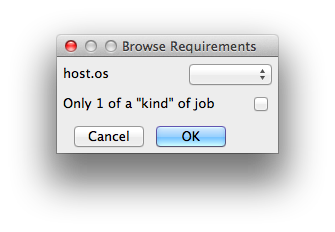
Worker properties needed to be met for job to run on that Worker (comma-separated, expression-based). Click 'Browse' to choose from a list of Host Order Options.
 |
|---|
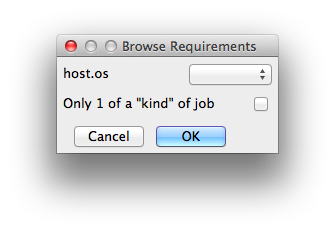
Requirements is a way to tell the workers that this job needs specific properties to be present in order to run. The drop-down menu allows a choice of OS:
You can also add any other Worker properties via plain text. Some examples:
With integer values, you can use any numerical relationships, e.g. =, <, >, <=, >=. This won't work for string values or floating point values. Multiple requirements can also be combined with AND and OR (the symbols && and || will also work). The 'Only 1 of a "kind" of job' checkbox will restrict a Worker to running only one instance with a matching "kind" field (see below). The prime example is After Effects, which will only allow a single instance of AE on a machine. Using this checkbox and the "Kind" field, you can restrict a Worker to only one running copy of After Effects, while still leaving the Worker's other slots available for other "kinds" of jobs. |
Reservations
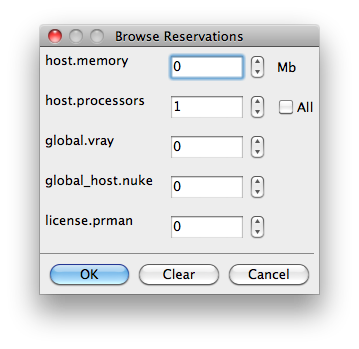
Worker resources to reserve when running job (comma-separated, expression-based).
  |
|---|
Reservations is a way to tell the workers that this job will reserve the specific resources for this job. Menu items:
Other options:
|
Restrictions
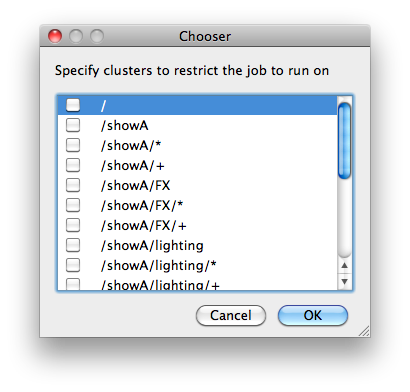
Restrict job to run only on specified clusters ("||"-separated) [+ means all below, * means at that level]. Click 'Browse' to choose from a list of Restrictions Options.
 |
|---|
Restrictions is a way to tell the workers that this job can only run on specific clusters. You can choose more than one cluster in the list. Examples:
|
See Also
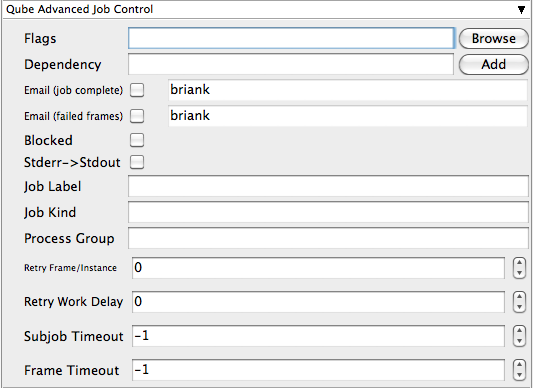
Flags
List of submission flag strings (comma separated). Click 'Browse' to choose required job flags.
|
|---|
| See this page for a full explanation of flag meanings |
Dependency
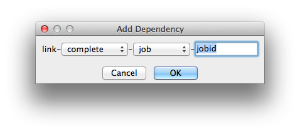
Wait for specified jobs to complete before starting this job (comma-separated). Click 'Add' to create dependent jobs.
 |
|---|
You can link jobs to each other in several ways:
The second menu chooses between "job" (the entire set of frames) and "work" (typically a frame). So to link frame 1 of one job to frame 1 of a second, job, you would choose "work" in this menu. If you want to wait for all the frames of one job to complete before starting a second, then choose "job". The other option, "subjob", refers to the instance of a job. This is much less common, but means that, for example, the instance of Maya that was running frames has completed. For a complete description on how to define complex dependencies between jobs or frames, please refer to the Callbacks section of the Developers Guide. |
Email (job complete)
Send email on job completion (success or failure). Sends mail to the designated user.
Email (failed frames)
Sends mail to the designated user if frames fail.
Blocked
Set initial state of job to "blocked".
Stderr->Stdout
Redirect and consolidate the job stderr stream to the stdout stream. Enable this if you would like to combine your logs into one stream.
Job Label
Optional label to identify the job. Must be unique within a Job Process Group. This is most useful for submitting sets of dependent jobs, where you don't know in advance the job IDs to depend on, but you do know the labels.
Job Kind
Arbitrary typing information that can be used to identify the job. It is commonly used to make sure only one of this "kind" of job runs on a worker at the same time by setting the job's requirements to include "not (job.kind in host.duty.kind)". See How to restrict a host to only one instance of a given kind of job, but still allow other jobs
Process Group
Job Process Group for logically organizing dependent jobs. Defaults to the jobid. Combination of "label" and "Process Group" must be unique for a job. See Process group labels
Retry Frame/Instance
Number of times to retry a failed frame/job instance. The default value of -1 means don't retry.
Retry Work Delay
Number of seconds between retries.
Subjob Timeout
Kill the subjob process if running for the specified time (in seconds). Value of -1 means disabled. Use this if the acceptable instance/subjob spawn time is known.
Frame Timeout
Kill the agenda/frame if running for the specified time (in seconds). Value of -1 means disabled. Use this if you know how long frames should take, so that you can automatically kill those running long.

Cwd
Current Working Directory to use when running the job.
Environment Variables
Environment variables override when running a job. You can specify key/value pairs of environment variables
This is useful when you might need different settings for your render applications based on different departments or projects.
Impersonate User
You can specify which user you would like to submit the job as. The default is the current user. The format is simply <username>. This is useful for troubleshooting a job that may fail if sent from a specific user.
Example:
Setting "josh" would attempt to submit the job as the user "josh" regardless of your current user ID.
Note: In order to do this, the submitting user must have "impersonate user" permissions.
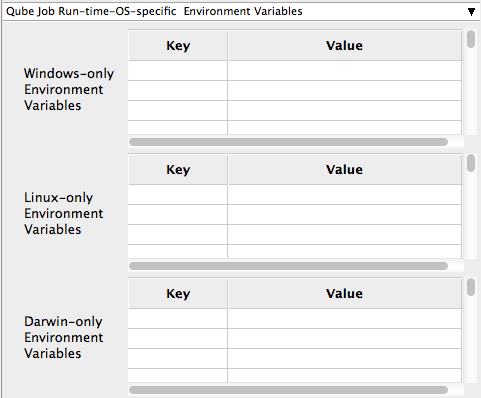
Windows-only Environment Variables
Used to provide OS specific environment variables for Windows. Enter variables and values to override when running jobs.
Linux-only Environment Variables
Used to provide OS specific environment variables for Linux. Enter variables and values to override when running jobs.
Darwin-only Environment Variables
Used to provide OS specific environment variables for OS X. Enter variables and values to override when running jobs.
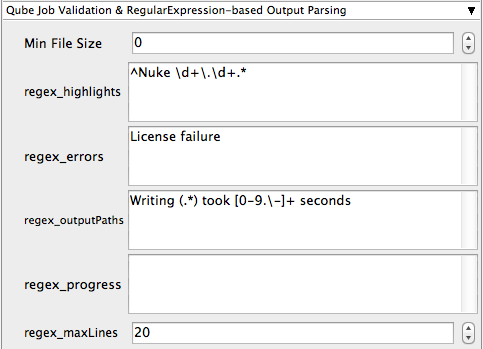
Min File Size
Used to test the created output file to ensure that it is at least the minimum size specified. Put in the minimum size for output files, in bytes. A zero (0) disables the test.regex_highlights
Used to add highlights into logs. Enter a regular expression that, if matched, will be highlighted in the information messages from stdout/stderr.
regex_errors
Used to catch errors that show up in stdout/stderr. For example, if you list "error: 2145" here and this string is present in the logs, the job will be marked as failed. This field comes pre-populated with expressions based on the application you are submitting from. You can add more to the list, one entry per line.
regex_outputPaths
Regular expression for identifying outputPaths of images from stdout/stder. This is useful for returning information to the Qube GUI so that the "Browse Ouput" right-mouse menu works.
regex_progress
Regular expression for identifying in-frame/chunk progress from stdout/stderr. Used to identify strings for relaying the progress of frames.
regex_maxlines
Maximum number of lines to store for regex matched patterns for stdout/stderr. Used to truncate the size of log files.

GenerateMovie
Select this option to create a secondary job that will wait for the render to complete then combine the output files into a movie.
Note: For this to work correctly the "Qube (ImagesToMovie) Job..." has to be setup to use your studios transcoding application.

Account
Arbitrary accounting or project data (user-specified). This can be used for creating tags for your job.
You can add entries by typing in the drop-down window or select already created accounts from the drop-down.
See also Qube! Job Tags
Notes
Freeform text for making notes on this job. Add text about the job for future reference. Viewable in the Qube UI.
- No labels
- Powered by Scroll Content Management Add-ons for Atlassian Confluence 5.6.6 | 2.8.10
- Powered by Scroll Content Management Add-ons for Atlassian Confluence.
